
 680
680
Overview
Release 1.0 - Version 0.2
This app provides a means of reviewing any Assets captured on Getac BWC devices, such as videos and pictures.
Caution:
Once docked, all Assets will offload to Getac Enterprise or Getac Evidence and will no longer be viewable via this app. Log in to your digital evidence management system to review.
Installation
Prerequisites
- The "*Getac BWC Viewer app" is compatible with both Apple iOS and Google Android mobile devices.
- Your mobile device must support Wi-Fi and Bluetooth connectivity.
- Both Wi-Fi and Bluetooth must be enabled on your device.
- The "*Getac BWC Viewer app" is only designed for use with Getac body-worn cameras.
App Download
Follow these steps to download the app:
1. Open the Apple App Store or Google Play Store on your mobile device.
2. Search for "Getac BWC Viewer app."
3. Locate the "Getac BWC Viewer app" from the list of search results.
4. Tap "Get," "Install," or "Enable" to install the app on your iOS or Android device.
5. Once the installation is complete, find the "Getac BWC Viewer app" on your device's home screen and tap the app icon to open it.
Log In
Upon opening the app, you will be presented with the 'Log In' screen.
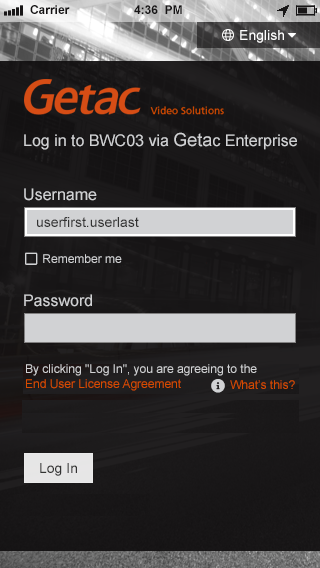

Type your Getac Enterprise or Getac Evidence user account name in the 'Username' field. Type your Getac Enterprise account password in the 'Password' field.
Info:
- Check the 'Remember me" option to save your username for quicker login.
- After you complete log-in for the first time, you will be prompted to 'Select a Device' (body worn camera). By default, 'Automatically choose my camera' is checked below the 'Password' field. This will remember your device (body camera) selection. Uncheck this box if you do not wish to automatically select the previously used device (body camera).
Click the 'End User License Agreement' link to view the EULA statement. Additionally, click the 'What's this?' link for more relevant help information on this topic.
Info:
Some mobile devices support additional 'log in' options such as 'Face ID' or 'Thumbprint Identification' / 'Touch ID'. If these features are available for your mobile device, the corresponding login option will appear below the 'Login' button. For additional information on these 'log in' features, consult your mobile device provider's help documentation.
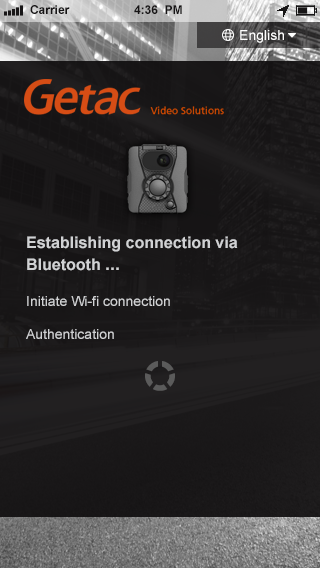
After you select your information and desired preferences, tap the 'Log in' button to start the login process. During this process, you will receive helpful messages that guide you through connecting via Bluetooth, setting up Wi-Fi, pairing your devices, and completing the authentication process.

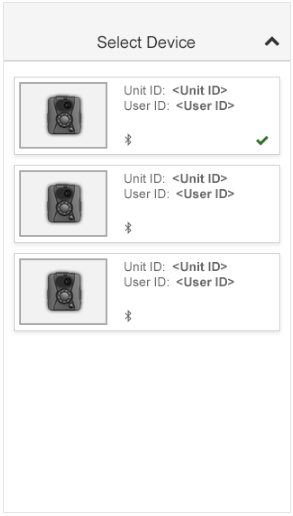
Device Selection
Device List
When you log in for the first time, you will see the 'Select Device' screen. After logging in, you can switch to another device by navigating to Account > Settings > Switch to another device in the app's secondary navigation menu under Account.
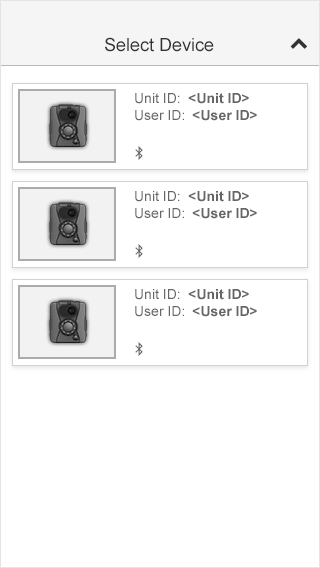

This screen allows you to select and pair the "*Getac BWC Viewer app" with your desired body-worn camera (BWC) device. It will automatically display a list of all Bluetooth-enabled BWC devices within range. If your BWC device does not appear on the list, please try the following troubleshooting steps:
Info:
Please refer to the BWC User Manual for further instructions or assistance with the following troubleshooting steps.
- Make sure your BWC device is powered on and has a sufficient battery charge.
- Make sure Bluetooth is enabled on your BWC device.
- Make sure your mobile device has Bluetooth enabled.
- Make sure your mobile device has Wi-Fi enabled.
- Ensure your mobile device and BWC device are in close proximity to maintain a strong Bluetooth signal.
Each BWC device in the list indicates the Unit ID and currently assigned user.
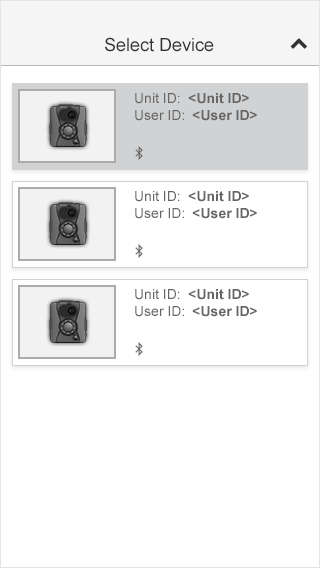
Device Pairing
Find and tap the desired device in the 'Select Device' list to begin the pairing and connection process.
 |
 |


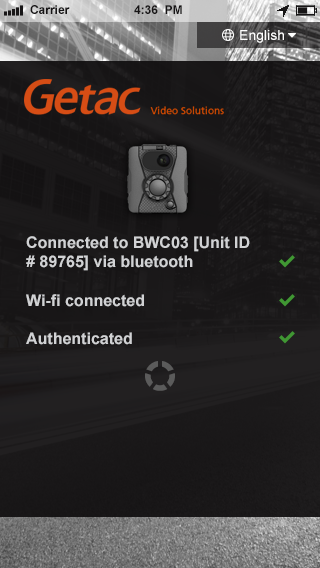
You will see a 'Progress Indicator' screen that confirms connections. Please follow any instructions that appear in pop-ups during this process.

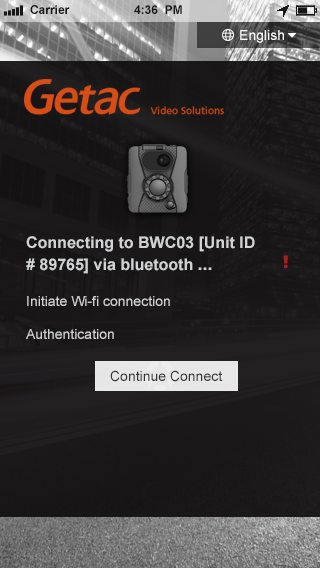
If there is an issue connecting to Bluetooth, the 'Continue Connect' button may appear. Tap 'Continue Connect' to proceed with the setup process.
Wi-Fi Connection
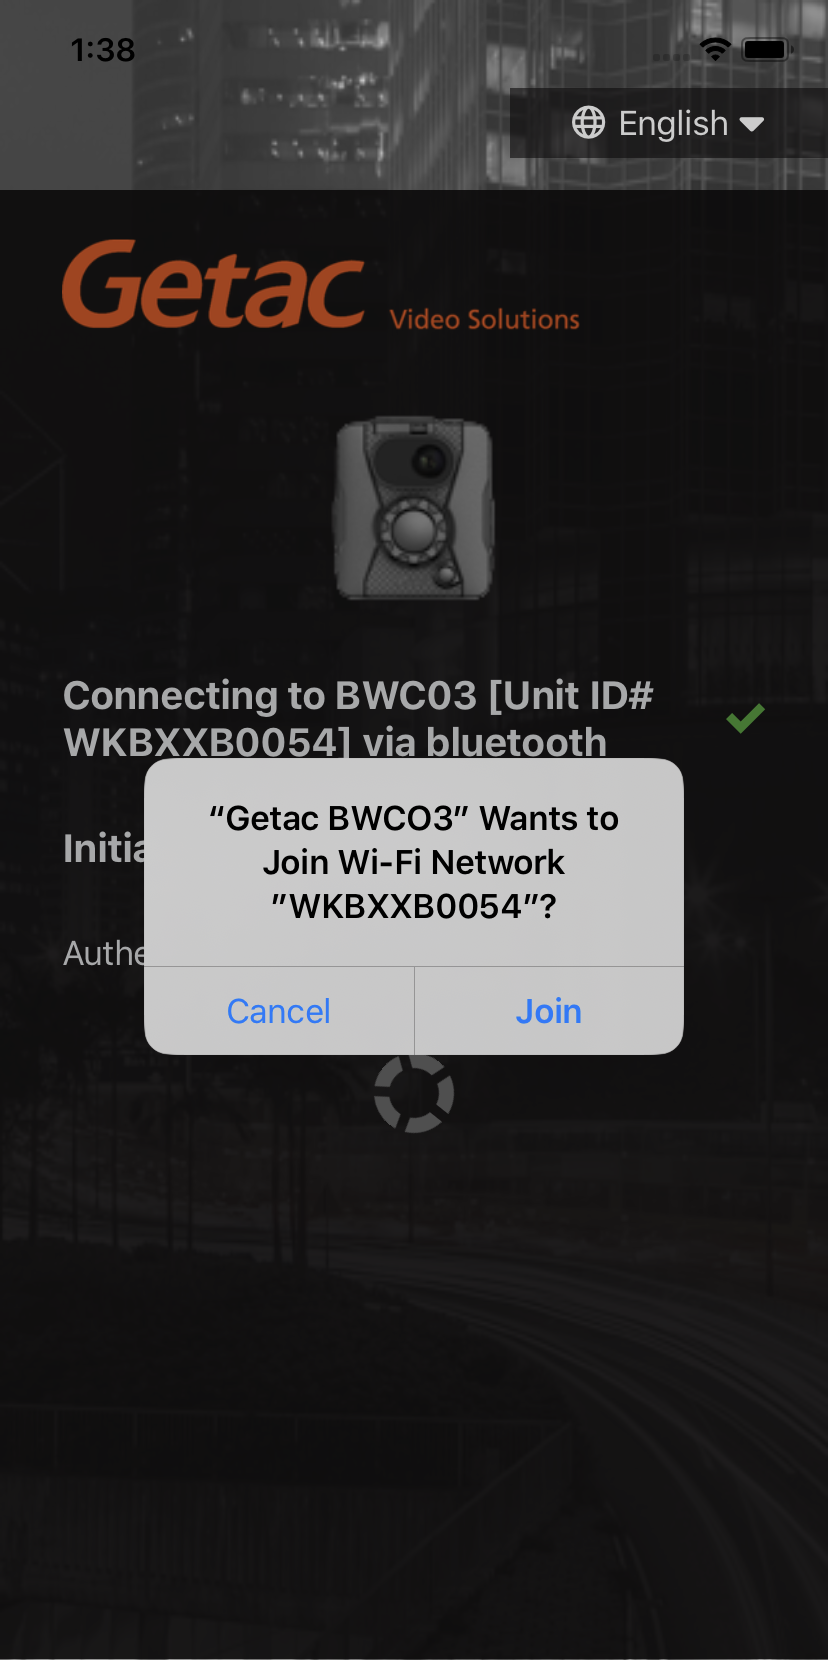
Your mobile device will display pop-up messages for connecting to the Wi-Fi. Please follow the on-screen instructions to connect to the BWC's Wi-Fi network.
Info:
For additional help enabling and connecting to Wi-Fi on your mobile device, consult your mobile device provider's help documentation.

Once the Wi-Fi connection has authenticated, return to the "Getac BWC Viewer" app and it will complete the connection to your BWC device.

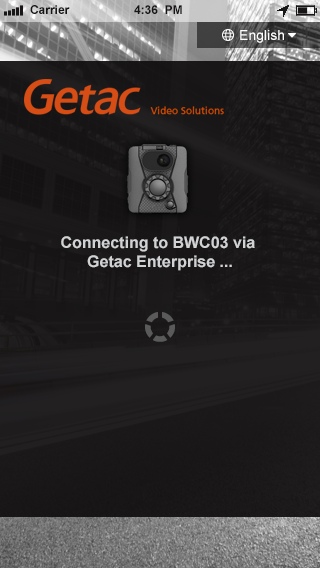
The app will finalize establishing a connection to your BWC device.
Navigation
Main Navigation
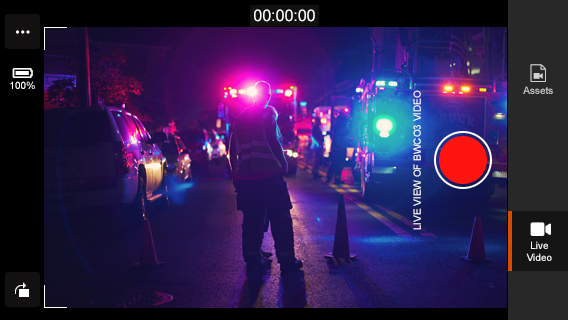
The 'Main Navigation' interface lets you switch between the 'Live Video' screen and the 'Assets' screen. Depending on your device's orientation, the app's 'Main Navigation' will appear at the bottom or on the right side of the screen.


Account Secondary Navigation
The 'Account' secondary navigation can be accessed from the 'Live Video' screen (when no recording is in progress) in both portrait and landscape views via the ⋯ icon, and from the 'Assets' screen also via the ⋯ icon.
Live Video
After you successfully log in and connect your device, you will see the Live Video screen.
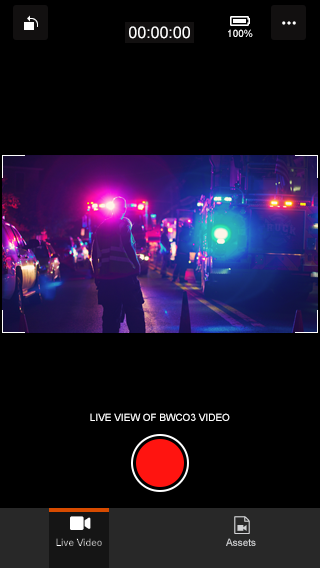

The 'Live Video' screen provides an overview of the live stream. When recording is not in progress, it displays a preview of the live stream. During recording, it shows the live stream along with the battery status of the connected Body-Worn Camera (BWC) and the recording controls. Additionally, when no recording is taking place, users can access the app navigation to 'Assets' and 'Account Settings and Help' from the 'Live Video' screen. The display and controls will adjust based on the orientation of your device.
Info:
If your mobile device has the screen rotation lock turned on, the feature mentioned above will not function.
Screen rotation can be initiated either by tapping the ![]()
![]() control in the corner of the screen or by manually rotating your mobile device.
control in the corner of the screen or by manually rotating your mobile device.
 |
 |

The battery charge status ![]() of the paired BWC device is displayed at the top right corner in both portrait and landscape views within the 'Live Video' screen.
of the paired BWC device is displayed at the top right corner in both portrait and landscape views within the 'Live Video' screen.
Recording
You can start recording either directly from the BWC camera or through the app. To initiate recording from the app, simply tap the 'record' button ![]() . While recording is in progress, access to the 'Main Navigation' and 'Account Secondary Navigation' features of the app will be disabled. The current duration of the recording will be displayed in the top center of the screen. At any point during the recording, you can tap the
. While recording is in progress, access to the 'Main Navigation' and 'Account Secondary Navigation' features of the app will be disabled. The current duration of the recording will be displayed in the top center of the screen. At any point during the recording, you can tap the ![]() button to add a bookmark. A bookmark feedback count indicator
button to add a bookmark. A bookmark feedback count indicator ![]() will keep track of the number of bookmarks you have made.
will keep track of the number of bookmarks you have made.
Info:
Bookmarks are used to make key point-in-time reference points on the timeline for when reviewing recorded videos.

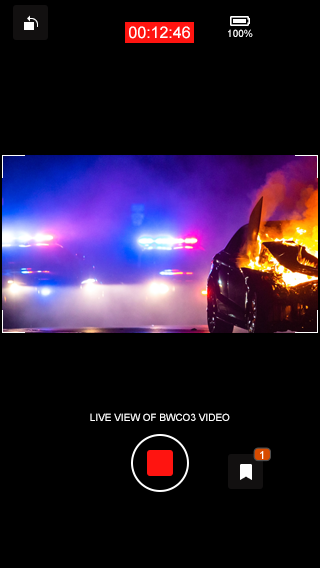
You can stop recording directly from the BWC camera or through the app. To stop recording using the app, simply tap the 'Stop Recording' button. Once a recording is finished, you will see the category selection screen.
Info:
Live video recording and preview functionality are unavailable when the BWC device is connected to the dock.
Category Selection
The 'Choose Category' screen appears after a recording is completed. It can also be accessed from any recorded asset on the 'Assets' screen and in the asset details.
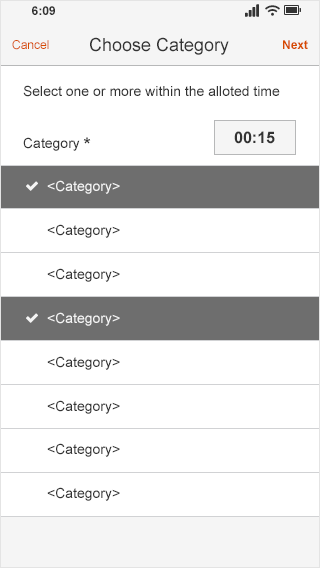

The 'Choose Category' screen allows you to select one or more categories to associate with the asset currently in focus. To select a category, tap on the items from the list. If you want to unselect any previously selected items, simply tap them again. Selected categories will be highlighted and marked with a checkmark. Once you have chosen the desired categories, tap the 'Next' button located in the top-right corner.
Info:
- Categories are used to classify recorded evidence (assets) and to apply retention and upload policies, respectively.
- After completing a recording, you will have a limited time to select categories.
- At least one category must be selected before leaving the 'Choose Category' screen. Tap the 'Cancel' button if you do not want to make or change your category selection.
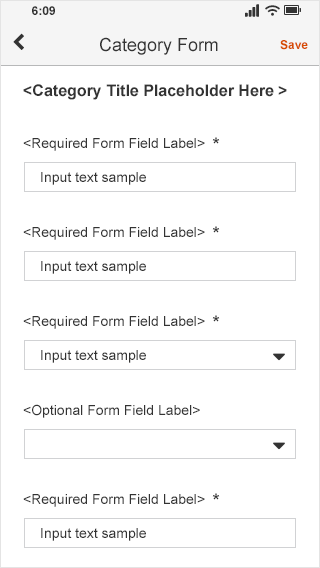
Category Forms
Depending on your agency's implementation, some available categories may have one or more associated forms. Once you select a category, you will be directed to either the form entry or the form selection screen.
The content of each form depends on your agency's implementation. On the 'Category Form' screen, please fill out all required fields. Once you have completed your entries, click the "Save" button located in the top-right corner. If you wish to discard your entries or any changes, click the back button ![]() in the top-left corner.
in the top-left corner.
Assets
The 'Assets' screen displays a comprehensive list of all assets currently available on the connected BWC device.
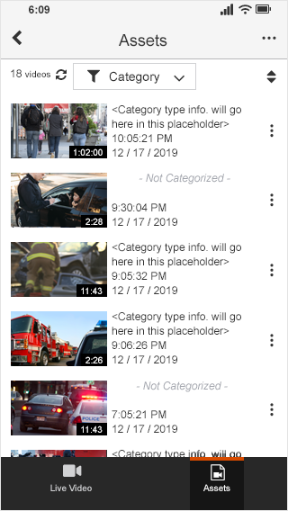

The 'Assets' screen displays a list of video thumbnail images along with basic information about each recording. For assets that are not categorized, a label ![]() will be shown next to them. To categorize an asset, click the 'actions' icon ⋮ to either 'Add Category and Form' or to 'Edit Category and Form' for those that have already been categorized.
will be shown next to them. To categorize an asset, click the 'actions' icon ⋮ to either 'Add Category and Form' or to 'Edit Category and Form' for those that have already been categorized.
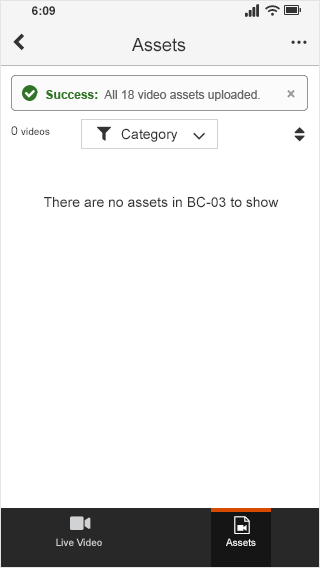
In the top-left corner, the 'video count' indicates the total number of recordings available on the BWC device. The uploading icon ![]() next to the video count signals that the assets are currently being uploaded to the Enterprise application/server when connected to either the single dock or master dock.
next to the video count signals that the assets are currently being uploaded to the Enterprise application/server when connected to either the single dock or master dock.
You can use the filter control to narrow the list down to a specific category ![]() . Once a filter is applied, the Assets list (shown below will display only the selected category. To clear the filter, simply tap the 'x' in the 'Category filter' area.
. Once a filter is applied, the Assets list (shown below will display only the selected category. To clear the filter, simply tap the 'x' in the 'Category filter' area.
Additionally, there is a control ![]() for sorting the list in either ascending or descending order based on the recorded time. You can swipe the screen up or down to navigate through the list. Links at the bottom allow you to switch back to the 'Live Video' screen. Tap on an asset in the list to access the video detail page.
for sorting the list in either ascending or descending order based on the recorded time. You can swipe the screen up or down to navigate through the list. Links at the bottom allow you to switch back to the 'Live Video' screen. Tap on an asset in the list to access the video detail page.
Info:
Whenever the BWC is connected to the dock, the assets will be uploaded to the Getac Enterprise/Server. Once the upload is complete, the assets will no longer be stored on the BWC device and will also be removed from the "Getac BWC Viewer" app.

Asset Detail
The 'Asset Detail' screen provides an overview of the recorded asset. Here, you can view detailed information about the asset, access associated form data, view bookmarks, and add or edit categories and forms. Additionally, you can access the video playback.
If an asset has not yet been categorized, no form data will be displayed. In this case, you will see an 'Add Category and Form' button in the 'Form Data' tab section.
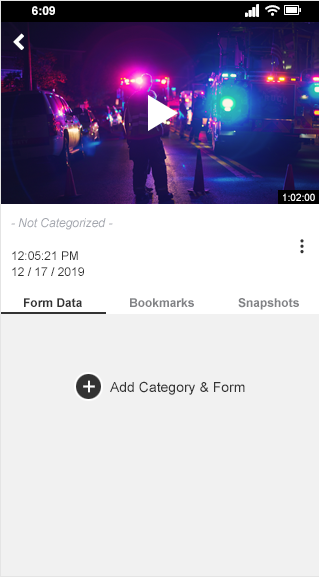

Click the 'Actions' icon ⋮ to either 'Categorize' or 'Edit a Category and Form' associated with the asset. To view the relevant information, tap on the 'Form Data' or 'Bookmarks' tabs. You can swipe up or down in the lower section to navigate through these subsections.
If you added any bookmarks during the recording process, they will appear in the 'Bookmarks' tab alongside the built-in bookmarks labeled 'Video Start' and 'Video End.' To start video playback at a specific bookmark point, tap on an item in the bookmarks list that has the play icon.
To return to the 'Assets' list, use the ![]() button located in the top-left corner.
button located in the top-left corner.


Playback
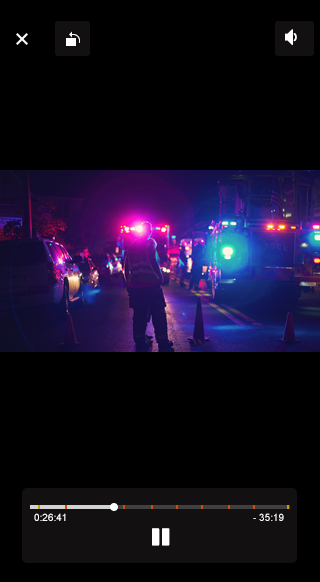
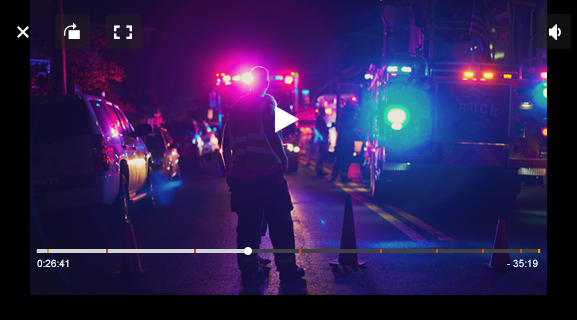
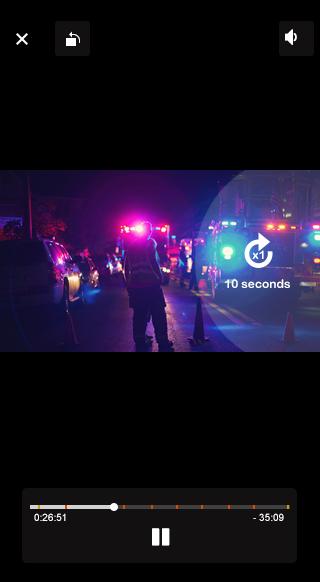
The 'Playback' screen offers a comprehensive video player that allows you to review the footage of your asset in detail.


The 'Playback' screen allows for playback in both portrait and landscape orientations. The display and controls will adjust based on your device's orientation. You can initiate screen rotation by either tapping the control in the corner of the screen or by manually rotating your mobile device.
Info:
If your mobile device has the screen rotation lock turned on, the feature mentioned above will not function.
 |
 |

You may see a progress indicator ![]() in the center of the display while playback is loading or buffering. To exit the playback screen, use the
in the center of the display while playback is loading or buffering. To exit the playback screen, use the ![]() button in the top-left corner.
button in the top-left corner.
The volume feature can be controlled either through your device's physical volume controls or directly within the app. To adjust the volume in the app, tap the volume icon to mute or unmute the sound. To change the volume level, press and drag the audio bar indicator ![]() left or right.
left or right.
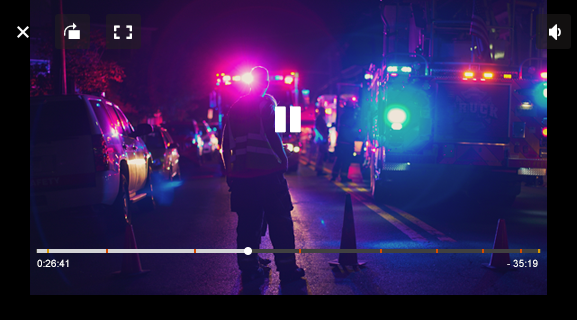
To pause or resume playback, tap the ![]() button located in the bottom center of the screen. The orange tick marks
button located in the bottom center of the screen. The orange tick marks ![]() on the timeline bar indicate bookmarks that you have created, while the yellow tick marks
on the timeline bar indicate bookmarks that you have created, while the yellow tick marks ![]() represent built-in bookmarks that specify the start and end of the video. If no bookmarks were created during recording, no start and end bookmarks will be shown.
represent built-in bookmarks that specify the start and end of the video. If no bookmarks were created during recording, no start and end bookmarks will be shown.
You can drag the timeline scrubber left or right to navigate through the video. The timing indicators located under the timeline bar show the video's duration. The duration on the left indicates how far you are into the video, while the duration on the right displays how much time is remaining from that point.
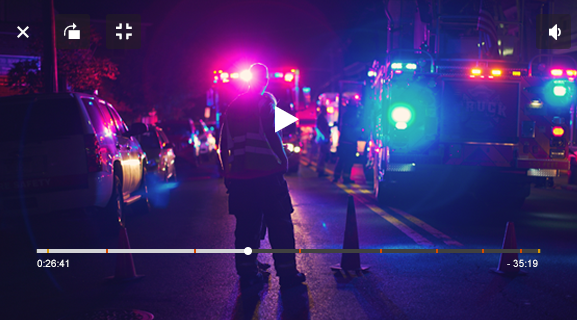
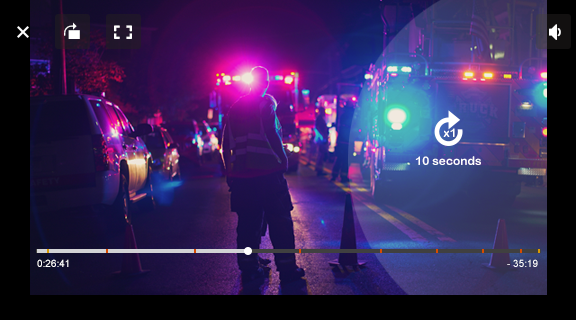
In landscape mode, use the 'Full Screen' button ![]() to view the video in full screen. Press the 'Exit Full Screen' button
to view the video in full screen. Press the 'Exit Full Screen' button ![]() to return to regular landscape mode.
to return to regular landscape mode.
 |
 |


While playing a video, you can navigate through the content using the following gestures:
- Double-tap the left or right side of the playback screen to skip ahead or back by 10 seconds.
- Tap twice quickly to skip ahead or back by 20 seconds.
- Tap three times to skip ahead or back by 30 seconds.
 |
 |
Account
The 'Account' secondary navigation includes links for managing app settings and accessing the help section for various informational resources.
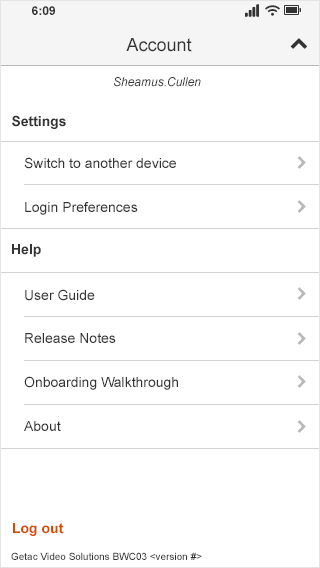
Switch to another device
Tap the 'Switch to another device' option to return to the 'Select Device' screen and change the BWC device currently connected to the app.
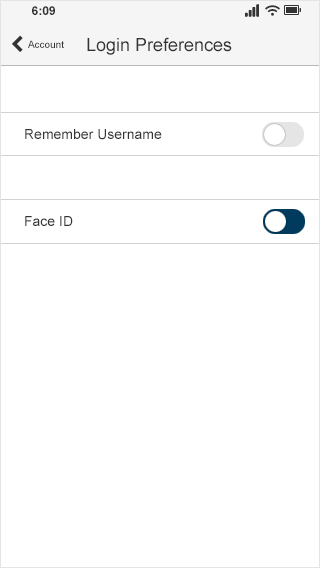
Login Preferences
Tap the 'Login Preferences' option to adjust the 'Remember Username', 'Use Face ID', or 'Use Touch ID' settings. Tap the corresponding toggle switches to enable or disable these options.

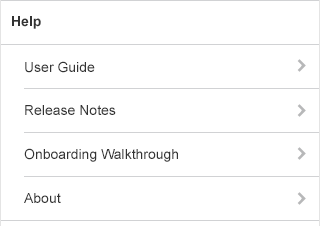
Help
In the 'Help' section, you can access the 'User Guide', the current 'Release Notes', the 'Onboarding Walkthrough', and the 'About' screen. You will also find the current app version information at the bottom of the 'Account' screen.

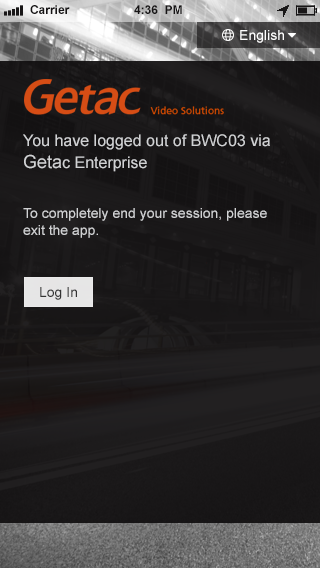
Logout
To log out of your user account, tap the 'Log Out' button located at the bottom of the 'Account' section in the secondary navigation. After logging out, a confirmation screen will appear to confirm that you have successfully logged out. However, to completely end your session, you will need to exit the app.

Connecting the BWC Device to a Dock
When you connect the Body-Worn Camera (BWC) to the dock, the recorded files will be uploaded to the Getac Enterprise/Server. Once the upload is complete, the files that have been uploaded will no longer be on the BWC device, and as a result, they will also be removed from the Getac BWC Viewer app.

Info:
"Getac BWC Viewer app" name may change in the future.

