Mar 07, 2024
 591
591
Note:
This article showcases features that are typically only made available to Administrator roles.
However, since Getac Enterprise is highly configurable, the ability to complete tasks described in this article may be different for each User, depending on policy. Please contact an administrator with all access questions and concerns.
However, since Getac Enterprise is highly configurable, the ability to complete tasks described in this article may be different for each User, depending on policy. Please contact an administrator with all access questions and concerns.
Warning:
The information listed here is to explain this feature. This is configured by the Getac implementation teams and should NOT be modified without first contacting [email protected]. Getac is not responsible for data loss or interruption of services due to improper configuration of this feature.
Overview
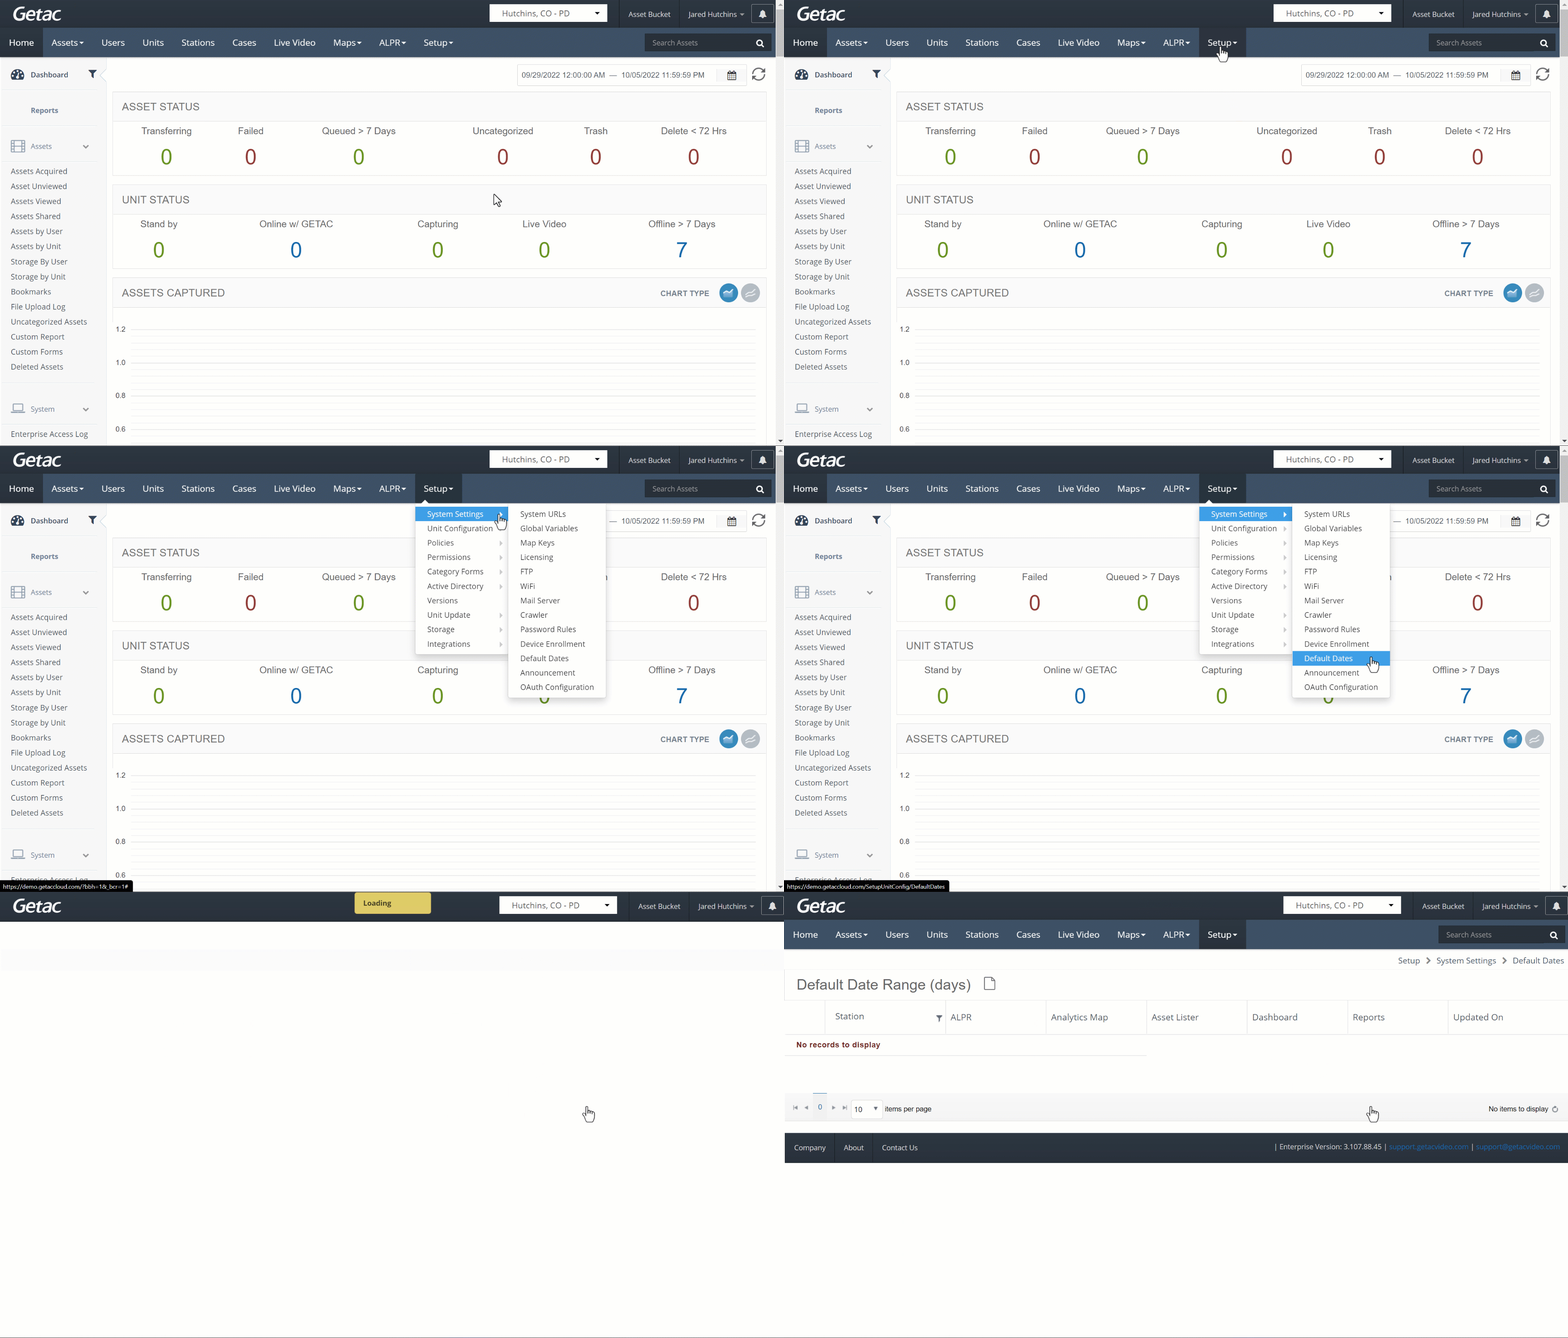
Specify the default time periods with their respective data, displayed in the following areas:
- ALPR (DO NOT USE).
- Analytics Map.
- Asset Table.
- Dashboard.
- Report pages.
See image below for how to access the Default Dates page:

Create or Modify Default Date Template
Default Date templates can be created and assigned to individual Stations. Station Default Date templates can be edited and deleted from the Default Dates page.
To create or modify an existing Default Date template, perform the following steps:
- Click on the Page icon, or select an existing template from the list and click on the Wrench icon.

- Specify the parameters, then click on Create or Save to finalize.

The parameters are as follows:
- Station (days) - Select which station this template will apply to.
- ALPR (days) - DO NOT USE.
- AnalyticsMap (days) - Number of day's data shown by default on the Analytics Map.
- AssetLister (days) - Number of day's data shown by default on the Accessing the Assets Page.
- Dashboard (days) - Number of day's data shown by default on the Dashboard.
- Reports (days) - Number of day's data shown by default on all Reports.
- Create/Save - Click to finalize settings.


